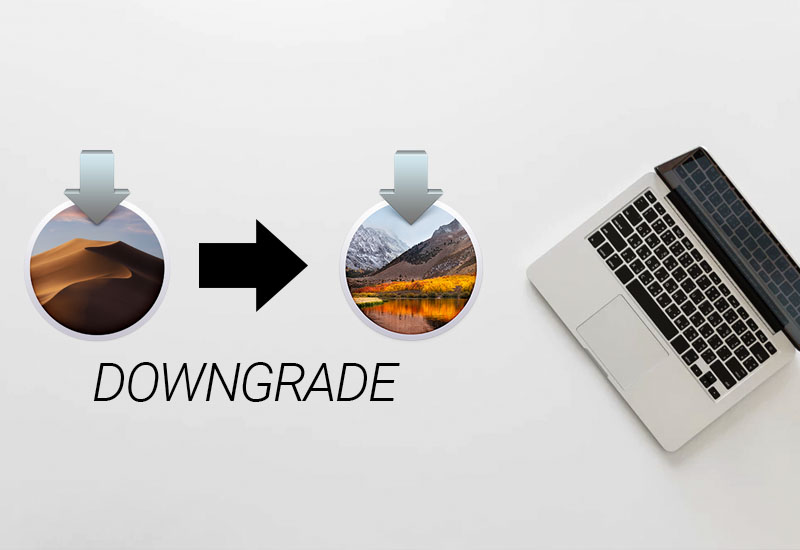
Tutorial: How-to Downgrade macOS Mojave to Older macOS (High Sierra, Sierra, or El Capitan)
Are you trying to downgrade your macOS? Follow our tutorial to get started. We provide a step-by-step guide with pictures of each step. In this tutorial, I will be downgrading from macOS Mojave to macOS High Sierra, but you can downgrade to other macOS versions as well by following the instructions.
Before we begin, please note that in order to downgrade macOS, you will need to reformat your hard drive - meaning you will lose all of your data. Please backup all your files before you begin. You will also need an empty USB flash drive for this tutorial. In this tutorial, I will be downgrading from macOS Mojave to macOS High Sierra, but the instructions are the same if you are trying to downgrade to another macOS version.
Downgrade macOS Mojave
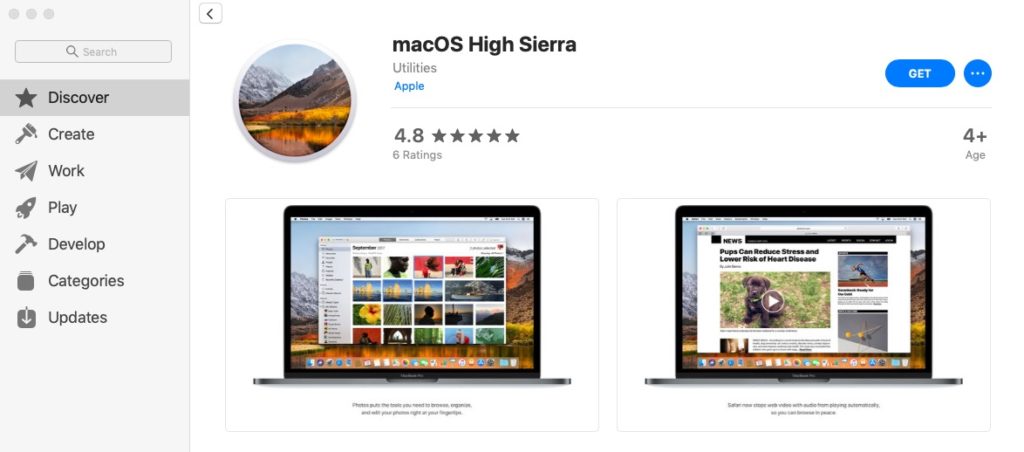
1. Download the macOS you want to downgrade to from the App Store. Press GET.
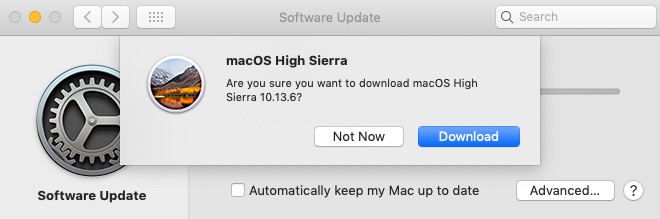
2. Press Download - this step may take awhile since the download file is huge.
3. If you get prompted with “This copy of the “Install macOS” application is too old to be opened on this version of MacOS”, hit Quit. Don’t worry, this is normal since the system will not just let you install an older OS.

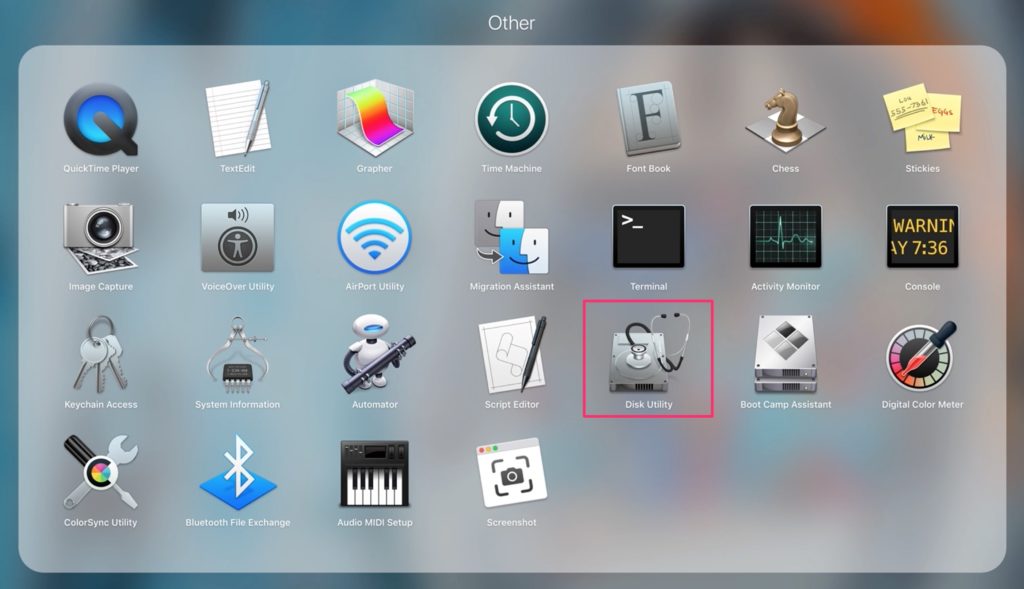
4. Now we will need to create a bootable USB. Connect your USB flash drive to your computer and open Launchpad > Other > Disk Utility.
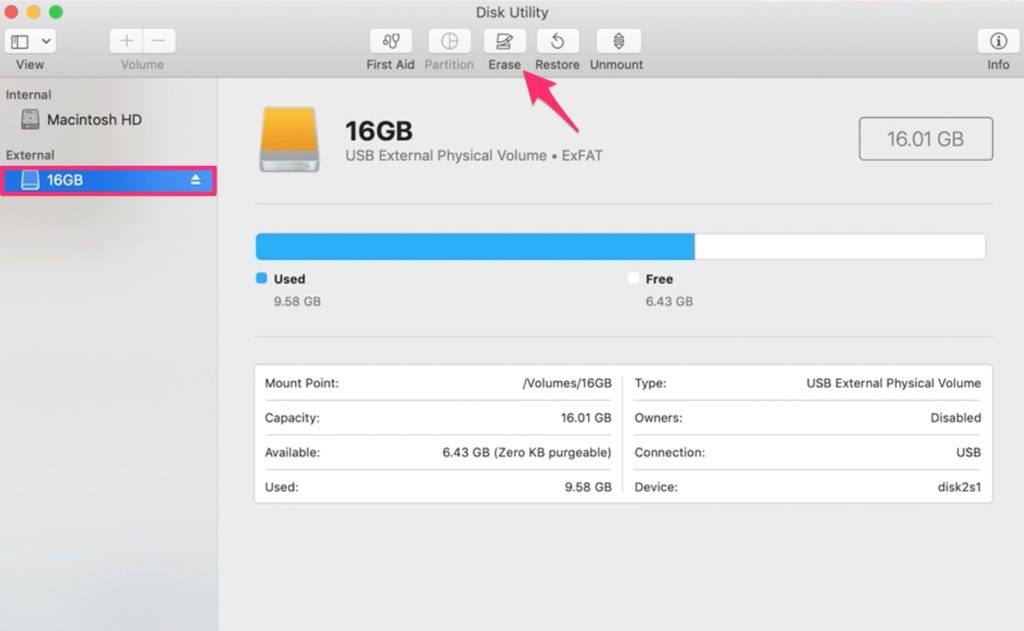
5. Under External, select your USB flash drive and press Erase.
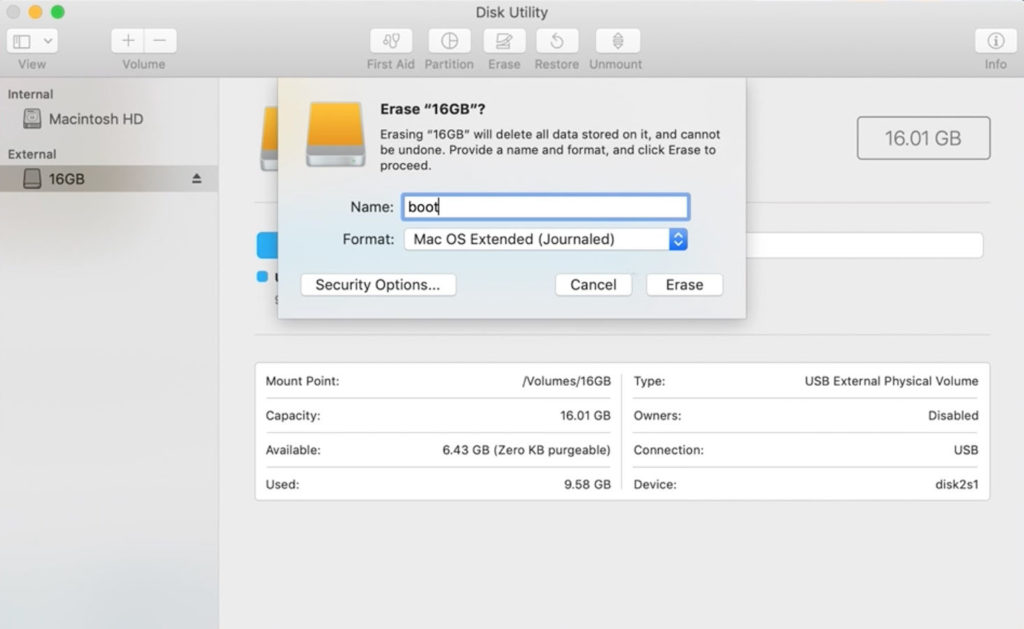
6. Name your drive “boot” (all lowercase without the quotations) and select Mac OS Extended (Journaled) as the Format. Hit Erase.
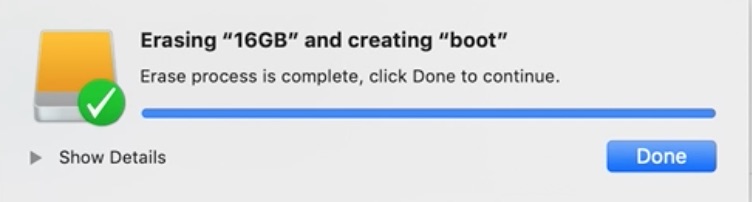
7. Once it is finished, hit Done.
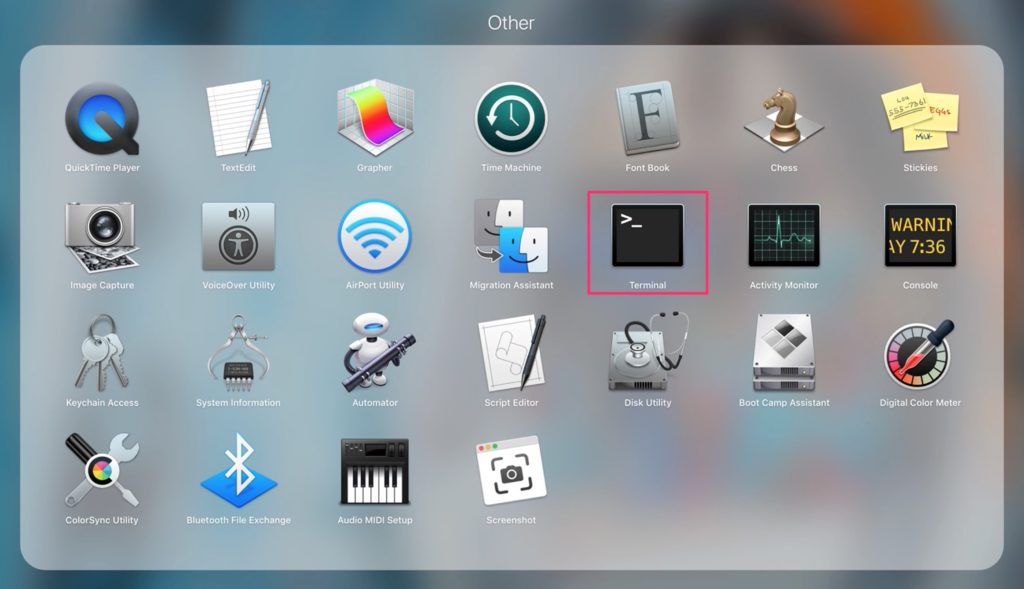
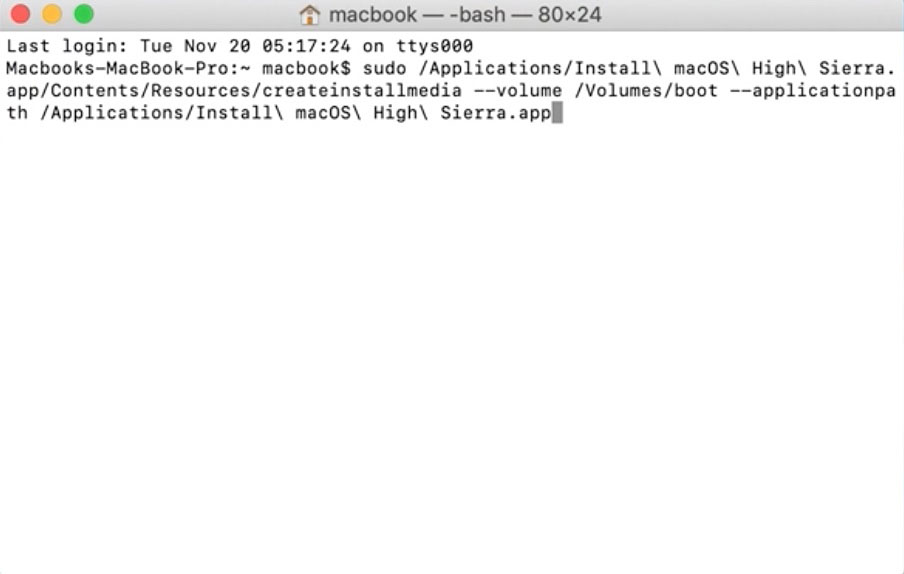
8. Go to Launchpad > Other > Terminal.
9. Copy and paste the following code that corresponds to the macOS version you are downgrading to into terminal and press Enter:
macOS High Sierra:
sudo /Applications/Install\ macOS\ High\ Sierra.app/Contents/Resources/createinstallmedia --volume /Volumes/boot --applicationpath /Applications/Install\ macOS\ High\ Sierra.app
macOS Sierra:
sudo /Applications/Install\ macOS\ Sierra.app/Contents/Resources/createinstallmedia --volume /Volumes/boot --applicationpath /Applications/Install\ macOS\ Sierra.app
macOS El Capitan:
sudo /Applications/Install\ OS\ X\ El\ Capitan.app/Contents/Resources/createinstallmedia --volume /Volumes/boot --applicationpath /Applications/Install\ OS\ X\ El\ Capitan.app
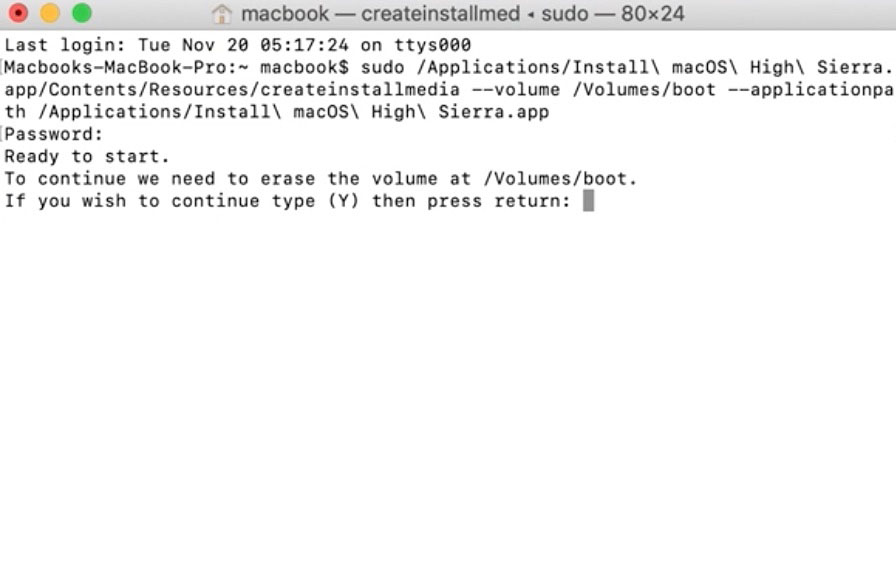
10. Enter your password for your computer and press Enter.

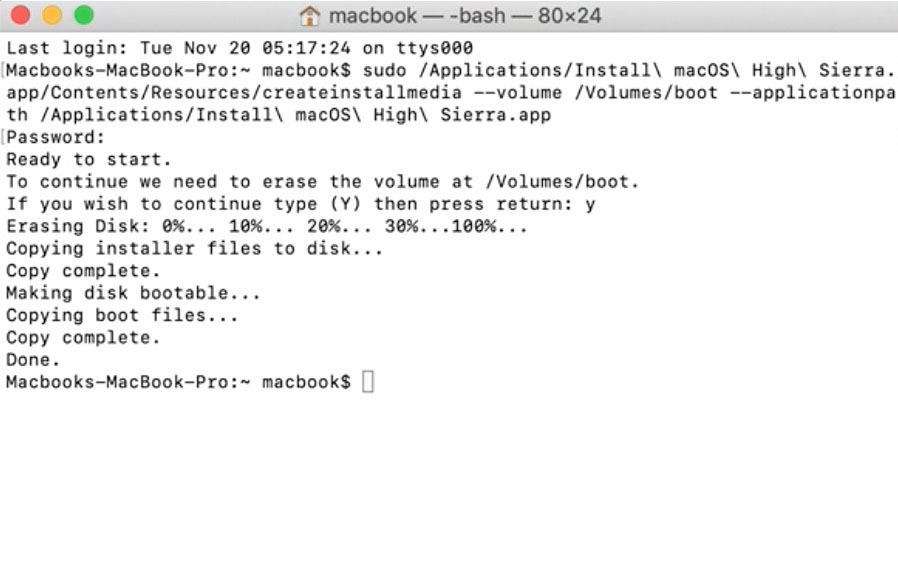
11. Type y and press Enter.
12. Once it is complete, you can exit Terminal.
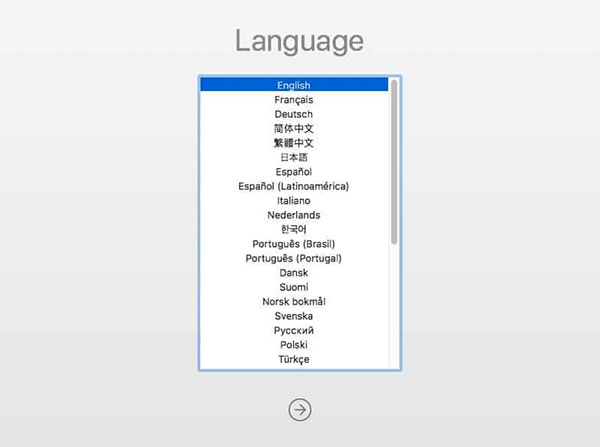
13. Restart your computer and hold down Command + r on your keyboard while the computer boots up.

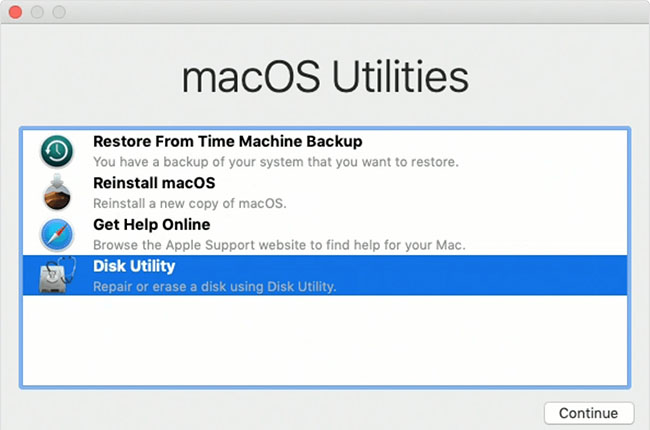
14. You should see a Language selection screen - if you do not see this screen, restart your computer and hold down Command + r on your keyboard to try again.
15. On the next screen, go to Disk Utility.
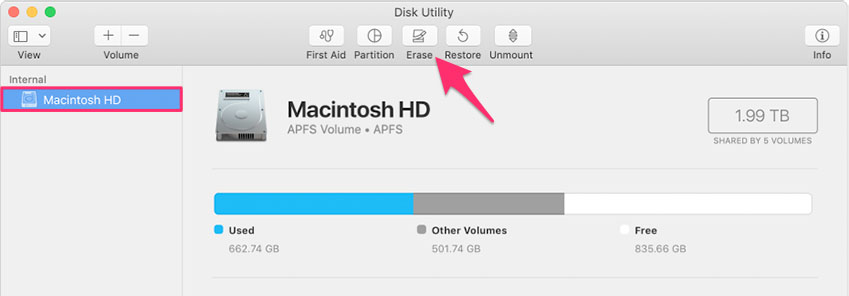
16. Select your Macintosh HD under Internal and press Erase.
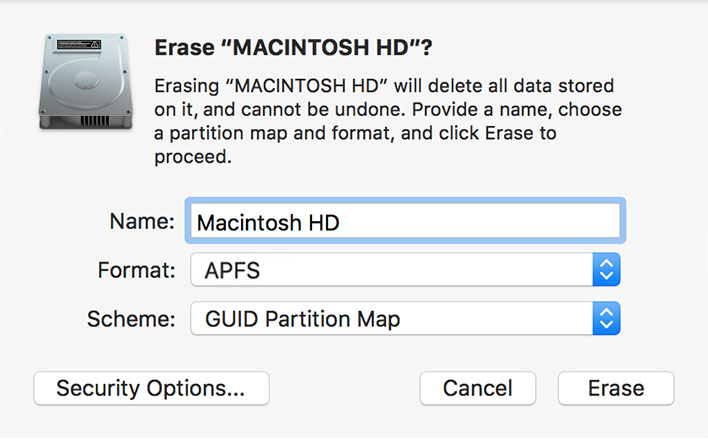
17. Make sure the format is APFS and press Erase.
18. Once the process is completed, restart your computer and hold down the Option key while the computer boots up.

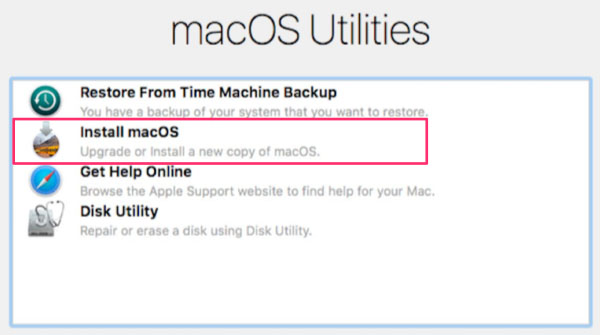
19. Press Install macOS <OS version>. This step may take a while.

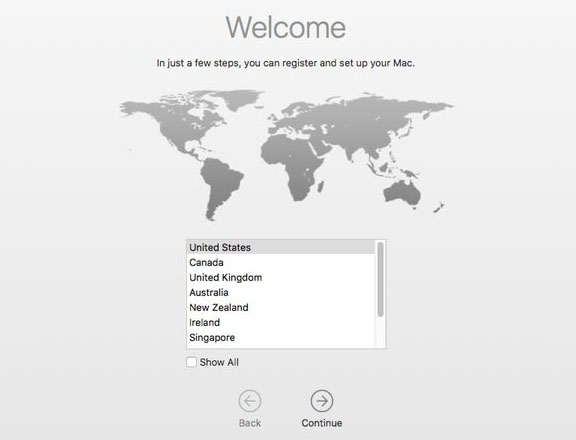
20. Select your language.
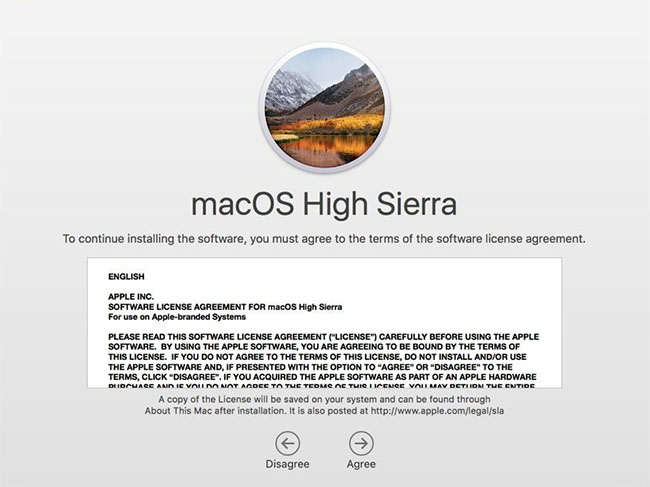
21. Hit Continue and accept the macOS software license agreement.
22. Now select your Mac hard drive and press Install.
23. After the installation is finished, complete the initial setup and you are done.
The whole process took me over two hours but it varies depending on your computer and internet speed. If you have any questions, please leave them in the comment box below.
10 thoughts on “Tutorial: How-to Downgrade macOS Mojave to Older macOS (High Sierra, Sierra, or El Capitan)”
Worked great, apart from the hyphens before Volume giving me an error code, figured it out after some googling but should be ‘ – – Volume’ not —Volume’
Thanks
Thanks for the heads up. I didn’t realize my system automatically converted the double dash to an em dash. I updated the post to reflect the correct line.
Hi thank you very much for the video this is very helpful as I lost my hopes. I gave my Mac book to Mac service center, even they couldn’t do it but with this video I can install high Sierra so that I can run fcp. Thanks a lot man.
Thanks a lot. Was very easy.
Thank you very much. Worked a charm. You have the best, easiest and most up to date tutorial on this subject.
I’m thankful that I came across your tutorial. Really appreciate how simple you made the process. Worked like a charm.
Great instruction set. Thanks
absolutely a great tutorial thank you so much for the ease of it all
Pretty great !
I update High Sierra to Catalina, and get many troubles.
The only big difference is that Catalina create another partition for the personal data, so I delete it also. I’ll see later on if I did well or not !
thanks anyway, great job !
Thank you so much for this perfect tutorial! Downgrading from Mojave to High Sierra without any problems thanks to you. This tutorial should be on the Apple support pages!